Hi there, I'm Deb from Manchester, England & welcome to my brand new craft blog! Those of you who know me will know I allready have a craft blog where I share stamped character images coloured with Distress Inks (just click on the Craftrocks tab above) However I also make cards for Simply Cards & Papercrafts,other craft magazines and have recently started an exciting new venture with LOTV. I usually work in soft pastel colours in a shabby style, expect handmade cards, Scrapbook layouts, Altered Art & more. I love to inspire & be inspired - it would be great to find some fabulous new challenges & blogs to follow. I'd love some followers here too so why not introduce yourself - always happy to answer questions as well as hearing your thoughts & suggestions! Enjoy your visit & call back soon, Deb.x

Thursday 22 August 2013

LOTV Vintage Sentiment 'Just to Say', Card & Box Set - 'Fika' collection by Maja Design

Hi there, today I'm also sharing this card & box set that I made for LOTV & used for my guest design spot I did at Live & Love craft. LLC is a UK store stocking all things vintage & shabby, since it has soon become my favourite craft shop where I can get a big chunk of my crafty supplies. They also have a great inspiration blog for some breath taking vintage inspired makes.
 
 
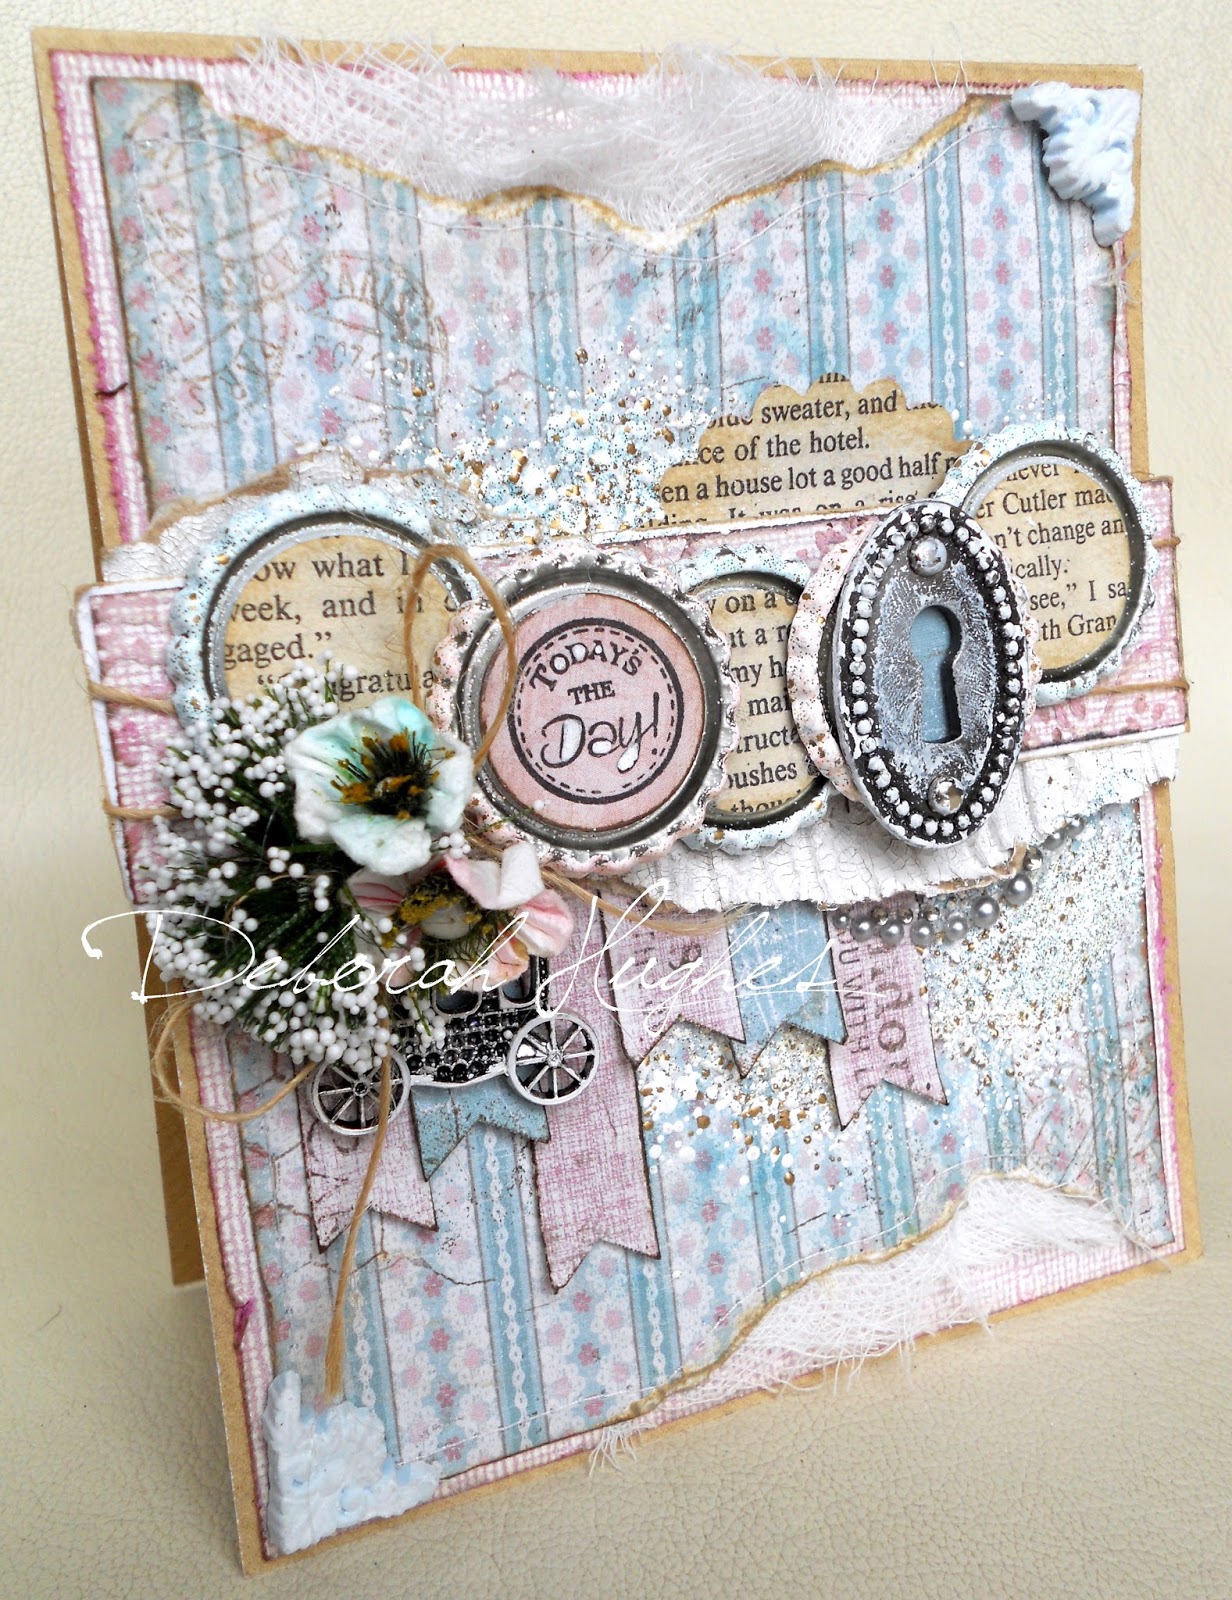
I decided to make a card and box set using this stunning 'Fika' paper collection by Maja Design in pretty shades of lilac and sage. The sentiment stamp is from the 'Vintage Sentiment - Just to Say' stamp set by LOTV. The rose toppers on the card and front of box and ornate circular frame are clay pieces made with Martha Stewart clay moulds. I mixed a light shade of lilac and pale green from the clay and filled the detailed sections in lilac and background sections in pale green.
 

The card (above) was made using Go Kreate Frilly Frame #5 die, and the box (below) with Spellbinders Nestabilities Fuer de Lies dies and scoring board. The oval card topper is a Spellbinders Floral Ovals die cut from Core'dinations Whitewash cardstock. I also used my new Martha Stewart clay kit to make the frame & corners on the box, and rose topper on the box & card. I mixed the colours to make a pale lilac & pale green, then added the lilac to the details and filled with green background.


I threaded lilac organza ribbon around the holes in the corner of the Feur de Lies die, then tied into a bow. I added white rose trim and lilac lace around the back and sides of the box and madegrungeboard hinges covered in Snow Tex for the front.


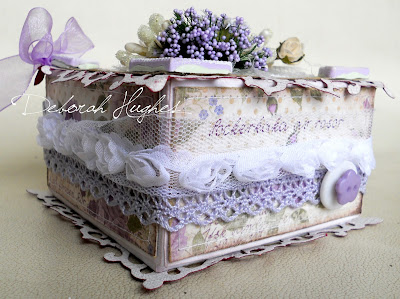
To the top of the box I applied SnowTex around the clay frame and behind the rose topper on the front. Flowers & berries are mostly kort & godt, lovely lilac spray all available from Live & Love Crafts.


Thanks for looking.
xxx

LOTV Calendar stamps card

Hi again! & here's the other card I made for LOTV using there Calendar stamps. This time I used one of the larger circular calenders. Mounted onto a Spellbinders Fancy Tags 3 die cut from kraft card then covered in Shabby blue Embossing Powder. Behind this is a Spellbinders Floral Oval cut from Core'dinations Whitewash card, underneath I added cheese cloth and Shabby White Frantage for a shabby chic effect.

 
The designer papers are from the Vintage Summer collection by Maja Design. Paper edges have been inked with Pumics Stone Distress Ink using a blending tool, distressed with the scissors, then stiched around on the sewing machine.
 
 
I added 3 banner shapes under the main topper and cut out a hand from some old packaging - maybe you recognise it from the 'That Special Touch of' logo?!! I also added some correogated card re-cycled from an old box, painted with Picket Fence Crackle Paint - love using this on my crads, its so effective & gives you instant texture, dimention and more shabby stylings.
 
 
The white/cream flowers & berries are by Kort & Godt, the mauve pink larger rose is Kaisercraft and the rest are from Live & Love Crafts. Below I ripped 2 of the edges and positioned lace behind the rip for 'peek-a-boo' lace effect which I just LOVE at the mo! The swirl die is a Magnolia Doo Hickey & the butterfly (just off the page) is Tim Holtx Movers & Shapers die cut from grungeboard & coated in Snow Tex.
 
 
Thanks for Looking.
xxx
 

LOTV Shabby Wedding Card - Bottle Top Art

Hi there and today I'm sharing a card I made for LOTV using there Calendar stamps.
I used these lovely papers by Maja design and made some bottle tops which I just love to make for using on my cards in a veriety of different ways. Here I hammered 5 bottle tops and treated them to shabby white, shabby pink & shabby ble Frantage embossing powders.
 
 
I made the corners with Martha Stewart clay moulds by mixing white with a little blue, I then distressed with Picket Fence Distress Stain. I ripped the paper edges, then inked with Pumice Stone and Antique Linen Distess Inks using a blemding tool for an aged effect, I then distressed slightly with the edges of the scissors and stiched around edges the sewing machine.
 
 
The strip is Core'dinations Whitewash cardstock embossed with Cuttle Bug embossing folder, raised section and edges have been lightly distressed with sand paper. The circular bottle top centeres have been cut from old book paper, the LOTV sentiment has been stamped onto Maja papers, cut out and mounted on the bottle top with foam pads. The last top has a Tim Holtz metal lock that has been distressed with Picket Fence Disterss Stain.
 
 
Underneath the strip I added some ripped coreogated card covered in Picket FenceCrackle Paint, banner shapes, inked and ditressed with a slightly shaped end, Shabby White Frantage and Prima Say it in Crystal pearls. Finished with Wedding carriage charm, twine & flowers.
 
Thanks for looking.
xxx

Friday 17 May 2013

LOTV in Maja Design papers 'Always & Forever'


Hi there, today I'm sharing the second of the 2 cards I made for LOTV using their Vintage Sentiments 'Just to Say' stamps. I used the same Maja Design Vintage Spring collection papers I used for my previous post.
 
Here's the Just add ink colour inspiration I used:


I've done the hidden lace under the ripped paper edges technique again and I've also used Shabby Blue Frantage powders under the embellishments.
 
 
The clay frame is handmade from my Martha Stewart clay making kit, I mixed a pale blue clay, filled the frame mould & left to dry, I then added white acrylic with a dry brush. The fence is a Magnolia Doo Hickey die cut from Core'dinations Whitewash cardstock with a little Picket Fence Crackle Paint added. The blue clay corner has also been made in the same way.
 
 
My fave part of the design though has to be the banner which is a strip I cut from the bottom of one of the Maja Papers, I trimmed a 'v' shape in the right end & added a tiny Tim Holtz brad. Flowers are a mixture of Prima, Kort & Godt & Live & Love Crafts.
 
 
Materials/Equipment:
Kraft cardstock (for card blank) * Core 'dinations Whitewash cardstock (for matt & fence) * Maja Design Vintage Spring 12x12 papers * Martha Stewart clay kit * LOTV Vintage Sentiment Just to Say stamps * Magnolia Doo Hickey Lovely Fence die * Tim Holtz caged bird die * Tim Holtz metal key * Picket Fence Crackle Paint * Shabby vanila seam binding * Prima Flowers * Kort & Godt flower * Distress Inks - Antique Linen, Walnut Stain & blending tool * doily * twine
 
I'd like to enter into the following competitions:
 The Colour Throwdown (daffodil delight, Kiwi Kiss, tempting turquoise, I know I'm missing the 'Real Red, but just couldn't resist!)
Just Add Ink - Colour challenge (see chart)
Friday Mash-up - I heart twine


Monday 13 May 2013

LOTV sentiment card with Maja Design papers and Tim Holtz elements

Hi all & today I'm thrilled to be sharing another card I made for LOTV, this time using their 'Vintage Sentiments - Just to Say' stamps.


I added the sentiment as the main focus in a Martha Stewart handmade clay frame. Underneath the banner shape I first added some shading with Antique Linen Distress Ink using a blending tool, I then stamped chicken wire in Walnut Stain, before adding shabby white Frantage embossing powder.
 
 
The beautiful vintage papers are by Maja design. I've used Core'dinations Whitewash cardstock on the matting & Layering and inked and sanded the edges. Paper edges have been inked with Antique Linen & Walnut Stain Distress Inks using a blending tool then machine stitched.
 
 
Flourish is by Tim Holtz, I added Snow Tex then coloured with Tumbled Glass Distress Stain.I added Shabby Blue Frantage to the banner itself. Flowers and charm all available from Live & Love Crafts.
 
 
Above shows hidden lace detail - I ripped the side of the paper, inked and sewn around the edge & added lace lined up with the edges.
 
I'd like to enter into the following challenges:
Cards Galore - A Tim Holtz Homage
Colour Q - Colour challenge
Flourishes Timeless Tuesday - Black Accents (sentiment)
Our Creative Corner - Anything Goes
Stampin' Royalty - Photo inspiration
Word Art Wednesday - Anything Goes

Thanks for looking!
xxx

Saturday 11 May 2013

LOTV 'Inspirational Sentiments' in Graphic 45 papers with Tim Holtz bookplate & Frantage

 
Morning all & today I have abother card I made for LOTV with their 'Inspirational Sentiment' stamps. I really love these quotes, the words are great & they look fab too.
 
 
To make the fan flower, cut a strip of paper 12x1.5", then fold alternatively at 1cm invervals. Glue the 2 ends together then form into a flat shape & glue onto a scrap piece of card.
 
 
To decorate the Tim Holtz metal bookplate, heat with a heat tool and apply blue Frantage, add several layers as desired. I also added some to the edge of the oval die cut and the folded flower using a Versa-Mark ink pad.
 
 
Flowers are kort & godt & white spray from Live & Love Crafts.
 
Thanks for looking!
xxx
 

Saturday 4 May 2013

The Rubber Buggy 'LOTV Inspirational Sentiments card'

Hi there & today I'm posting for my Saturday spot at The Rubber Buggy inspiration blog. Click this link to go to The Rubber Buggy store.
 
I made 3 cards and a matching box for LOTV using Graphic 45 Once Upon a Time papers. Here is one of the circular cards I made...

 
I made the circular blank using my X-Cut system, paper edges have been inked with Walnut Stain Distress Ink. The sentiment is by LOTV 'Inspirational Sentiment' - it's such a great set, there is 5 stamps in total & each one is beautiful.
 
 
The sentiment is stamped on a Core'dinations Whitewash cardstock die cut circle. I added pink Frantage embossing powder and matted onto a Spellbinders Nestabilities scalloped circle.
 
 
The butterflies are made with a Martha Stewart Classic 3in1 butterfly punch. I layered 2 together and folded the wings for dimention. The tag is from the Graphic 45 collection, I added a shabby bow and vintage button.
 
 
suggestions for The Rubber Buggy products:


Tuesday 30 April 2013

Hello & Welcome! Distress Stains card

Hello there crafters & welcome to my brand spanking new craft blog! Those of you who know me will know I  allready have a craft blog where I do mostly stamped character images coloured with Distress Inks. However I also make lots of different style cards and porjects, often for magazines and other craft based companies and have decided it was about time I had somewhere to share them all! I currently design for Simply Cards & Papercrafts, Creative Stamping and will soon be appearing in a few other craft mags. I have also just started an exciting new venture with LOTV who want to appeal to a wider audience with some of their exciting new product ranges, so stay posted (pardon the pun!)for some LOTV projects coming soon. I would also like to start exploring Scrapbooking and Altered Art projects a lot more & develop my multi-media skills, so after much deliberation came to the conclusion a new blog was the way to go! I hope you will enjoy visiting, become a follower, leave many a comment and I hope I can make some new friends & do the same in return...enjoy!
 
Here's a card I made for a Distress Inks project for SC&P just to give you a sneak peak idea of the kinds of things to come...
 
Papers are by Prima, the bottom strip is white Bazzil cardstock that has been sprayed with Mini-Mister then swirled round in several shades of Distress Ink applied to a teflon coated craft matt. After drying I embossed with Cuttlebug folder and inked the edges with a blending tool in Worn Lipstick and Walnut Stain Distress Inks.
 
 
Chipboard label also by Prima, tissue tape and metal lock is Tim Holtz. Flowers are Kort & Godt. I painted the chipboard crown in pink acrylic then added Glossy Accents. Sentiment done on computer. The stamp just visible over the top of the chipboard is from Tim Holtz Urban Chic collection.
 
Thanks for Looking!
xxx